Line6 PodHD Tone Guide
by MeAmBobbo
I can't take tone requests right now but will answer questions or give personalized advice via email to donors.
Back to Contents
A. Distortion Types/Overview
The most important part of getting a rock guitar tone is achieving the right distortion that you want. This certainly depends on which amp model you select; however, I want to address how to tweak a amp's tone before describing the available models. For any given amp, dialing in the desired distortion is often nowhere near as simple as turning the "drive" parameter on the amp or amp model up until the sound is as saturated as you like. A typical guitar rig will involve 4 main possible distortion stages - stomp box, pre-amp, power amp, and speaker, and you generally use one as your "main" distortion stage. However, any stage being pushed to breakup will distort in a certain way depending on the nature of the signal sent to it. This section mostly discusses what ways to expect a stage to breakup and how to alter the signal before reaching that stage to get the distortion you want.
The way any distortion stage breaks up is typically the result of the frequency response of the input signal, the waveform of that signal, and the nature of the distortion stage itself. These are tweaked by pre-EQ'ing, gain staging (or effect ordering), and amp/distortion selection, respectively.
As for distortion types, I generally identify 3: fuzz, crunch, and metal, which are derived from the peak frequency range fed into the distortion stage.
Fuzz is generated from distorting bass frequencies and is relatively loose in response to one's playing. Metal is the opposite, created from distorting mids/upper-mids frequencies, and is very tight. It is characterized by the djent sound created during palm mutes. Crunch sits in the middle, being a little boxier-sounding than metal, but not really fuzzy. I find the out-the-box Marshall tone is a perfect example of crunch, while the Treadplate and Fball amps characterize the metal tone.
The output of each distortion stage also depends on the waveform of the signal fed into it. Even if we were to EQ a guitar, banjo, violin, and piano signal to have roughly the same frequency response, the distortion produced by any particular distortion stage would have drastically different tones. For guitar, this is helpful, because we can alter a guitar signal before it hits a distortion stage, by using other distortion effects, modulation effects such as phasers, chorus, or flanger, time-effects such as reverb or delays, filter effects such as synths, and pitch effects such as octavers. This is a lot of ground to cover, so I'm not getting into it here, other than touching upon using multiple layers of distortion.
Unlike the simple pre-EQ distortion types identified above, the results of changing waveforms are more difficult to predict how they will impact the tone. In general, the amp or distortion effect has a relatively similar response given different signals, but you can still hear the impact of whatever effects placed in front of it. In other words, a Marshall will still sound Marshally with a Tube Screamer in front, but you can hear that there's a Tube Screamer in front.
Note that amps tend to "want" to distort one way or another. You can't make a Marshall JCM sound like an Mesa/Boogie Dual Recto just by putting some EQ on the incoming tone. Consider pre-EQ'ing more of a fine-tuning process, even though in some instances you are drastically altering the tone. You want to start by choosing the right amp model. This requires seeing the potential in an amp even if you think it initially sounds like crap. You have to ask yourself questions like, "What if it sounded less muddy?" or "What if I could get the grittiness out the tone?"
I'm not really a fan of fuzz tones, and this guide won't help you dial those in. I prefer to keep the tone being distorted on the bright side. I don't want to dial the bass completely out, though. I like tight bass in my final tone. We want the bass there, and we want the distortion phase to compress it but not distort it. This should keep it well-defined and tight. We use the bass knob (or an EQ effect later in the chain if we're using power amp distortion) to boost the bass to the desired volume, relative to the other frequencies.
Top of Page
B. Pre-EQ'ing
As mentioned above, one of the main ways to alter a distortion tone is to add some EQ in front of that gain stage, which is commonly referred to as "pre-EQ'ing". Sometimes I refer to this as sculpting my distortion, as I'm carving out the desired frequency response curve.
Using EQ effects to pre-EQ is the most transparent way to do this, preserving a lot of the amp tone while manipulating it to sound like you want. Other methods will have more impact on the signal before it hits the amp, diverging further from its natural tone.
Distortion effects can also be used to EQ the tone. Commonly, this is referred to as a boost or overdrive, using the pedal not to add its own distortion but change how the amp distorts. These terms are misleading - they stem from early use of overdrive pedals when amps had limited distortion available. They boosted the signal level forcing the amps to distort more than they otherwise would. Modern high-gain amps don't need such a boost, but they remain popular because of how they EQ the signal before the amp, changing how it distorts. It's more appropriate to refer to this as using a distortion pedal as a filter, but boost/overdrive commonly amount to the same thing. Using distortion effects for pre-EQ'ing is less transparent, as the distortion effect is usually adding some slight compression and/or distortion of its own, which may or may not be desirable.
For power amp distortion, the power section occurs after the amp's bass/mids/treble/presence controls, so those are going to have more impact on the distortion tone than the final frequency response.
Below is a guide of what to expect when pre-EQ'ing. To take full advantage of this guide, listen to your distortion tone. Does it have too much fuzz or grit? Try reducing the frequencies that correspond to that kind of tone. You don't have to necessarily get the tone to sound totally different, just tweak out the bad and dial up the good.
Top of Page
i. Frequency Chart
Here is a guide to how the tone is likely to sound with various peak frequency ranges hitting a saturated gain stage, or some frequency range being absent/deficient. Note: this is not foolproof - it depends on the amp/gain stage. Also, the numbers aren't an exact science - consider them to be fuzzy and use as a guideline only.
Also, please note that just because some frequency range is the peak doesn't mean it will dominate the tone. It is possible to have a mostly flat frequency signal with a slight peak in the muddy range, yet the signal won't be total mud - you'll get a bit of all the characteristics listed below. You can mix and match and balance certain aspects of the distortion with other ones. Usually that's exactly what you want to do. IE, a wide boost at 700 HZ will often add the djentyness and creaminess from the frequencies around it, rather than simply making the tone flat.
Make all these links to audio.
| Freq (HZ) | Peak | Lacking |
|---|
| 0-150 | Muddy | Thin |
| 150-250 | Fuzzy | Thin |
| 250-500 | Creamy | Cold |
| 500-800 | Flat* | Tinny |
| 800-1500 | Djenty | Buzzy |
| 1500-3000 | Crispy | Sterile |
| 3000+ | Gritty | Smooth |
* Flat means there is no real distortion tone - it sounds like compressed mids.
Applying this logic to the fuzz/crunch/metal distortion types I mentioned above, fuzz tones obviously emphasize low-end and metal tones upper mids. Crunch tones tend to emphasize mids, but extend into both metal and fuzz territory - the result of mixing both of them together more-or-less.
Top of Page
C. Gain Staging/Layering Distortions
As mentioned above, one of the main ways to alter a distortion tone is to place effects in front of that gain stage, that change the waveform of the incoming signal.
This is a very wide-open topic, but the general rule is to expect the final tone to be a mix of both. In other words, putting a phaser in front of a distorted amp will sound like phaser + the distorted amp tone. But it's obviously different than placing the phaser behind the amp. The way I differentiate between these is I think of anything placed before a distortion as "going into" that distortion, whereas anything placed after a distortion "goes on top of" the tone.
The main topic I wanted to discuss here was how to tweak having multiple distortions in the same signal chain, which is usually the case, even if only one of them is generating most of the distortion. My recommendation is to use one distortion stage as your main stage, with the others trying to complement it. That being said, zero'ing out the others usually gives me bad results.
Take a typical distortion effect -> preamp -> power amp chain, where each is contributing some distortion. I'll often use my pre-amp as my main distortion stage. While I am mostly using the distortion effect for pre-EQ, I may also want it to deliver a touch of compression and/or distortion. Depending on the distortion effect and amp, this slight distortion may warm up and smooth out the downstream amp distortion, or it may make it edgier and more aggressive-sounding.
As another example, let's say given the same chain I want the distortion effect to provide most of my distortion. Setting the amp's preamp Drive to 0% is going to sound weird. For a Marshall amp, I find I have to get it to at least 10% for the tone to start sounding natural, and about 20% to add the Marshall flavor. If this means the Marshall is also adding a little distortion, so be it. If I end up with too much distortion, I'll back off the distortion effect's Drive. Sometimes you also want to back off the distortion effect's output level, and dial in more pre-amp Drive from the amp or vice versa. This can have differing tonal effects even though you are getting the same total amount of distortion.
The same ideas apply for pre-amp vs. power amp distortion. Even if only one is your main distortion, you still want to give a little juice to the other.
Top of Page
D. High-Gain Amps
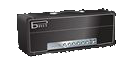 i. Park 75
This amp delivers a classic Marshall tone. By itself, it won't get you to high-gain territory; you'll need to boost the signal (such as with an overdrive pedal, distortion effect, or simple boosted EQ) heavily to get a saturated distortion from it. I don't recommend doing that - if you want more gain but a similar tone, try the JCM-800 model instead. I like this amp for medium gain tones (AC/DC), or if I want a Marshall tone but am using a distortion pedal/effect for my main source of distortion (Satriani). Compared to the JCM-800, it has a little less distortion available but it seems to be more reactive to picking dynamics. It gives you that clean-yet-distorted crunch feel.
I like to lower the amp's Bias (and Bias X which basically "locks in" my low Bias setting). This seems to make the amp sound more like a Marshall to me - a little more nasal sounding and you can get power amp distortion without it getting too gritty or splatty. I drop it between 0 and 20%. It also allows you to dial in a bit more distortion when you want to.
This amp model seems to be one of the ones that sounds better when you crank the power section. If I'm trying to make the model distort, I'll turn Master Volume up between 85-100%, then use the Drive knob to dial in the amount of distortion. For some reason, the power section responds very "poorly" when you turn up the Presence knob on the amp. I set low, often all the way to 0%. I also keep the Bass fairly low, to keep the power amp from distorting in a muddy fashion.
If I want it to stay clean, I turn down Drive first and if I need to go cleaner also Master Volume, but I generally try to keep the Master Volume higher than 50% and turn down Drive more. The power section gets you the Marshall tone. Also, the Bias setting is more responsive the higher you set Master Volume. But keep Drive above around 5-10%. Something weird happens to the tone if you go lower.
Top of Page
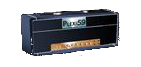 ii. Plexi Bright
This amp also delivers a classic Marshall tone. This model is VERY accurate. Comparing it to recordings that used this amp, it sounds almost identical. By itself, it won't get you to high-gain territory; you'll need to boost the signal (such as with an overdrive pedal, distortion effect, or simple boosted EQ) to get a saturated distortion from it, but that's not where it excels anyway. It's best for a clean-yet-distorted tone, in the vein of Randy Rhodes or early Eddie Van Halen. Compared to the JCM-800, it has less distortion available but it seems to be more reactive to picking dynamics and has a much more defined midrange.
The distortion is coming from the power section, so Bias and your EQ settings heavily affect the tone. I like to crank up presence, which gives it that real crunchy feel. Boosting treble too high makes it a little nasty. And boosting mids makes it a little too smooth for my tastes. I generally set mids and highs around the same spot, and boost presence as much or more than that. And turning up Drive all the way makes it too compressed. For the EVH tone, I like to crank the Bias.
Top of Page
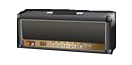 iii. JCM-800
This amp model sounds very similar to the Park 75, but more compressed and with much more drive. Without tweaking, it doesn't sound overly Marshally; but we can get it there. Tweaked properly, it can deliver great 80's metal tones. I hesitate to call it high gain. Although it can be dialed in to produce modern metal tones, I prefer to use other amp models to do so; however, I do use it for my Megadeth patches. My favorite patches with this are for a modern Satriani tone.
Like the Park, I like to turn down the Bias and Bias X. This gives you a more natural power amp distortion and a more nasal tone.
My prefered distortion from the amp is the power amp distortion. I particularly like the sound with the Master Volume set between 65-75%. Anything more is a little too extreme; anything less just doesn't get there. I find the sweet spot, then I tweak Drive to get the exact amount of distortion/saturation I want. But don't go too high with Drive, or you'll end up mixing a heavily distorted pre-amp section with a heavily distorted power amp section, and it can sound nasty. If you need more distortion with Drive up to 40-50%, I recommend putting a boost pedal in front the amp. This will at least tweak the pre-amp distortion, so it "plays nice" with the power amp distortion.
Note that when you have a saturated distortion using the power amp section, the nature of the distortion will respond to the pre-amp EQ settings. Turning up the Bass will make the distortion muddier. Cranking the Presence will make it splatty. I like to keep those knobs conservative and cranking Mids and/or Treble. I'll often turn Bass down to like 20% and Presence to 50%, while maxing out Mids and putting Treble between 70 and 90%.
If that leaves you with an unsavory frequency response to the tone, use EQ effects after the amp to boost the bass or presence, etc.
That said, don't try to make this amp something it isn't. Where this amp excels, is that rumbly, near-muddy Marshall distortion. While I generally prefer a smooth, tight low-end to my distortion, I found I wasn't impressed with the results when dialing in this amp like that. Other models simply do it better. My favorite tones from this model involve turning up the bass and not using so much gain as to make it super-saturated. I keep it percussive and buzzy, like a crunch tone from hell.
For distortion, sometimes I'll go the opposite route and turn the Master Volume down to about 35% and crank up the Drive knob. This creates a smoother distortion, but I find it has less character. I recommend using a distortion effect or EQ in front the amp, and tweaking it heavily to find your tone when dialing in the amp this way.
Top of Page
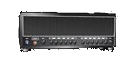 iv. Uberschall
The Uberschall gets us into true high-gain territory. We don't need to crank power amps or use boost pedals to get a saturated distortion tone. It has a very creamy sound, which can sound great for a lead tone or some modern hard rock. But it's also a bit muddy and a little fuzzy. Without a lot of tweaking the Uberschall won't give you a tight, djenty metal tone. However, with tweaking, it sounds pretty awesome.
You can't get the distortion characteristics of this amp on any other models. The Park and Marshall models sound 80's-ish, while the Mesa, ENGL, and Elektrik sound quite modern. This sits somewhere in between. Until Line 6 adds a Soldano SLO, 5150, and/or Mesa Mark, this is probably the amp to use to get as close as possible to those tones.
Many forum members claimed that Line 6 "broke" the Uber with firmware version 1.2, because the newer version was WAY muddier. (Of course, they brought back the old Uber as the Line 6 Elektrik later on, leaving little room for complaint.) I like the changes to the tone - I think it sounds more like a real amp. But from all the clips I've heard of the real amp, I don't think it sounds like a real Uberschall. And I do not think the presence knob acts like the real thing (while the Elektrik does ironically).
You have to add a strong EQ to your signal before the tone hits the amp to get the tone where I feel it belongs. There's quite a few ways to do this. My favorite is to use a Mid-Focus EQ. You can set the high-pass frequency to around 40-60%, really dialing out the muddy low-end. With the low-pass, you can set it to 100% to keep all the searing high frequencies, or you can move it downwards making the tone more and more creamy and vowel-y. An interesting trick is to boost the low pass Q. This actually creates a resonant peak at the cutoff frequency, so you can boost the exact frequencies you want to draw out the exact distortion tone you want.
You can also use a Studio EQ, such as with Low Freq 75 HZ, -5.5db and High Freq 800/1500 HZ, +6 db. I found good results from doubling up two Studio EQ's, so you can fine-tune the punch and mids frequencies too, to keep the tone thick while keeping it mud-free. Or you can just use a Parametric EQ to boost the center frequency you want. Or use combinations of EQ's. I like using a Mid-Focus to trim the mud and grit, and use a Parametric EQ to boost the upper mids/treble with the perfect Q.
You can alternatively use a Tube Screamer and turn down Bass while cranking Tone, but leave Treble around 50% (for the Classic Distortion, turn up Filter to around 70-75% and turn up treble just a bit).
The EQ controls behave a little strangely. Mids seems to also affect the highs - I like to turn it up high and use EQ effects to really dial in the midrange response I want - usually I'll cut around 750 HZ a bit. Treble gives you good control over dialing in just the right amount of sizzle on top. Presence behaves more like a traditional presence control than the midrange-peak sweep on the actual amp, but watch out because strong settings will strongly affect the tone.
I tend to leave the DEP's alone or near 50%, with the exception of Bias X. I used to adjust Hum to about 70% which seemed to change the tone a little, but then I noticed there's this faint digital sounding tone in additional to the main guitar tone - it's most audible when doing slow bends on the higher strings. So I now leave it at 50%. Bias X I like to turn up, which gives notes more of a blooming type sound and makes the amp more expressive. If anything I'll reduce Sag a bit. Bias can change the mid-range response heavily and make the tone a little more gritty at higher settings. I am not sure about Master Volume - it doesn't seem to have a strong effect on the tone, other than compressing the tone at higher settings. So I treat it like a compressor, which comes in handy for tones where you don't want a heavily-saturated distortion, but you want good sustain. Also, keep in mind it affects the impact of the other settings, so you may want to turn it up a tad if you are changing the other DEP's.
Top of Page
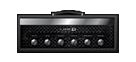 v. Dual Rectifier
Line 6 dialed in the classic Mesa/Boogie Dual Rectifier tone beautifully. You can get a variety of great tones from it, from hard rock to metal. It will djent without a boost, and it doesn't have any awkward kinks that you have to dial out. I don't necessarily try to replicate an artist's rig when I'm trying to dial in their tone - I often find a different amp model dialed in a clever way gets me closer to the tone. This is not the case here. If I want to replicate an artist that uses a Boogie Rectifier, I use this amp model without hesitation. If you like its tone, you lucked out with Line6's implementation. I use this amp for modern Dream Theater and Meshuggah tones, as well as some of my own personal tones.
I find this is the most straight-forward high-gain amp on the Pod HD. All the controls behave as you'd expect them to. The only surprise is that it has loads of bass. When matched with the rather bright Treadplate cab; however, it gets canceled out and sounds great. The only thing to watch out for is the treble knob; it can dominate your tone at higher levels.
You probably don't need to use any form of overdrive/EQ before the amp - it is preset to djent. However, a mild EQ will dial out any mud if you have dark pickups. Also, a slight EQ boost at 1 kHZ will make it slightly more djenty. Using a Tube Screamer will make the tone super tight, which works great for the down-tuned metalcore or death metal stuff.
This thing has tons of bass in comparison to other models, and it is difficult to tame. I find a Parametric EQ with frequency around 15% works best, and I usually use that in conjunction with a Mid-Focus EQ - I'll set the high pass Q to 0% and move HP Freq from 0% upward until I find where the boominess is gone.
The most control over the distortion tone comes from the Master Volume parameter. Higher settings get a dirtier distortion - a lot more bite. I tend to set it lower - around 30%. This keeps the tone nice and spongy but still with a good bit of bite. I'm still experimenting with the rest of the DEP's, but if anything I'll just set Sag lower. I like the Bias controls usually at 50% for now. To get the super-cold sounding Meshuggah tone, I change it up a little - I like Master Volume pretty high (~80%). Hum seems to change the splatty-ness of the distortion. I believe I turn it down a little sometimes to make the tone more spongy.
Top of Page
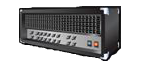 vi. Fireball
A great representation of the ENGL sound - very midsy yet modern and djenty. It's a bit looser than the Dual Rectifier and a bit dirtier - it has a wonderful gritty tone, think Jeff Loomis. Has loads of distortion and is pretty simple to dial in. It's a great choice for any kind of modern metal when you don't want the Dual Rectifier sound. I use this amp mainly for Periphery and Scar Symmetry tones, but you can actually get a good 80's metal sound out of it due to its midrange response.
The Presence and Treble controls are a bit sensitive at higher settings, but sometimes you need them up high to get enough sizzle to the tone. They seem to provide very subtle changes during initial adjustments than start to hurt the tone, usually making it too harsh. Bass doesn't seem to do very much. Mids is more responsive but also more forgiving - I usually set it up fairly high and, like the Uber, use EQ effects to really dial in the midrange response.
A mids-boost on this amp can make it really djenty. Ola's hand job patch uses a Screamer with Bass down to 35%, tone up to 75%, and Treble at 45%. I also like using a Classic Distortion with Drive ~5-15%, Bass 35%, Filter 75%, Treble 60-65% to make it really aggressive - djenty but also dirty.
Another trick is to use EQ before the amp, boosting the mids, but turning down some of the really high end. This makes the tone much smoother sounding - Studio EQ with Low Freq at 700 HZ, +5 db, High Freq at 5000 HZ -4db.
I generally like to turn up the Master Volume to the 70-100% range for my Vai tone. This really makes the amp thump, but it also makes it a little looser. If you want a tighter tone, turn it down. This amp seems the most forgiving with its DEP's. For lower Master Volume settings, reducing Bias tends to make the amp sound more real in my mind, although this does suck out some mids which you'll have to add back in. For higher Master Volume settings, Bias tends to make the amp sound a little looser and more midsy and warm at lower settings, but tighter and crisper and colder at higher settings. For the life of me, I can't seem to notice any change in the tone with the Hum control.
Top of Page
vii. Elektrik
I'm meh on this model. It doesn't do anything the Uber doesn't do that I find the Uber does better, even if it takes more tweaking with the Uber to get there. I never use this amp. It sounds too much like a modeled amp, not a real amp to me. You can hear it in the mids. It sounds like some annoying kid going "uhh uhh uhhh".
Immediately selecting this amp, you will notice something doesn't sound right. For some reason, the default "Master Volume" DEP value is 100%!!!! Set that down to at least 50% or lower, and this amp becomes at least usuable.
The Presence setting is a little non-traditional. I find a value around 45% keeps the amp djenty. Higher values make the amp more crunchy like a Marshall. Otherwise, it behaves similarly to the Uber, especially the mids knob.
Top of Page
viii. Dual Rectifier "Pre"
Normally I don't deal with the pre-amp only models because I feel like they're the same as their full counterparts, only missing bite and a full frequency response (they sound thin). Yet the Dual Rectifier's pre-amp sounds different from the full model - I consider it an entirely different amp model. It has a very smooth, spongy distortion, compared to the full model having more bite and grit. I like to use it for my Metallica black album tone.
You'll notice with the "Pre" variant, you have to use a bit more gain. Also, there's much less bass and more mids. So I generally turn down Mids and turn up Bass more than usual.
Otherwise the same rules apply as the full model, regarding boosts and EQ's. There are no DEP's to deal with.
Top of Page
E. Distortion Effects
i. Tube Drive
This is probably my most commonly-used distortion Effect. It works well as a filter. It tends to make the tone a bit warmer and smoother. It also works well as a primary distortion, getting the kind of tone I'd expect from a Boss DS-1 or a general-purpose distortion pedal that uses a tube for distortion tone.
I use this frequently with the Marshall amps. It helps give them a bit more lower midsy warmth without losing bite. I find it can add a touch of compression, so you can preserve the distorted-yet-clean Marshall crunch while still having a thick lead tone and nice sustain. I use it in front of the Fireball to get a less djenty sound, while still still keeping the crisp high-gain tone from the amp.
I use this in my early Van Halen, Slash, Rhoads, Vai, Satriani tones. I even use it for a Meshuggah tone. I use it in various other patches when I need a solid distortion effect.
I avoid turning the Treble knob too high here. Bass I often turn up fairly high, and I'll set mids even higher sometimes. But Treble can make the tone a bit harsh when cranked up.
Top of Page
ii. Screamer
The Tube Screamer is one of the most infamous pedals of all time. Used by Stevie Ray Vaughn to God Forbid, it's a classic choice for enhancing an amp's distortion. I don't find myself ever using it as a standalone distortion, as it comes off a bit thin and harsh. But using mild Drive levels and pre-EQ'ing amps has a unique effect that is difficult to describe.
The first thing you need to realize is that the "auto" impedance setting when this effect is first in the chain is 230 K. This may leave the sound a little less crisp than desirable - the actual pedal's impedance is 500 K. Try setting the input impedance manually to 1 M to get more bite in the tone. Conversely, if it's not the first effect in the chain, or you aren't using "auto" impedance, it might have too much bite for your tastes, and you might want to consider reducing your input impedance to 230 K. My suggestion is to use 1 M then use an EQ effect to roll off a little high-end before the pedal for the most authentic tone.
This pedal tends to reduce bass and focus in on mids and presence, pushing your amp into djent-mode, without necessary making it gritty. It can make the tone pretty cold as well, which works nicely for metal.
The Pod HD version includes bass and treble controls not on the original. Use them where tone isn't getting your tone where you want. I find I'll often turn up bass a little bit, as this pedal really sucks out a lot of bass.
This pedal dials in a good bit of upper mids, but it also seems to roll off some top-end (in addition to the "auto" 230 K impedance) and can flatten out your attack some. Take this into account when setting Amp DEP's and compression.
When dialing in this pedal for metal, the pitfall is to set Tone very high. This definitely gets the cold, presence-focused, brutal tone the pedal is known for, but it can be a bit too much and make the tone too "scratchy". If you get to that point, try backing off the Tone.
Top of Page
iii. Classic Distortion
The Classic Distortion seems at first to be inferior to the two distortions mentioned above, and maybe it is; but it's worth considering when you need a bit of something different that you can't find with the two above. Its standalone distortion tone is similar to the Tube Drive. But its filtering can be similar to the Screamer.
The trick to reigning in this pedal is to keep things relatively neutral. The bass and treble parameters can be quite extreme. From there, it's all about finding the sweet spot on the Filter control. This parameter is very tricky - turning it up seems to brighten the tone and scoop it simultaneously. I find I usually stay around 50% and often go lower with it, rather than higher.
One thing I like about this effect is that it gets pretty much 100% clean at 0% Drive. This can make it more ideal than the Screamer, which cannot get as clean, for certain scenarios where you want the Screamer filter tone, but you don't want the scratchy high-end, like a soft lead tone.
Top of Page
iv. Overdrive
This is basically a fuzzier version of the Tube Drive. The break-up is looser and a bit more raucous. I don't really have any purpose where I use this as a filter, but I do use it as a standalone distortion for a fuzz tone. I find I have to give it a little pre-EQ bass boost to get it as dark and fuzzy as I want it. I don't really have anything else to say about it.
Top of Page
v. Facial Fuzz
I'm not really into fuzz tones, but I do use this occasionally, particularly for a Hendrix or Eric Johnson tone. I find the key is to mix it with some Marshall amp distortion and give it medium gain. It mostly affects the break-up and looseness of the feel to your playing, while the amp distortion provides the real distortion flavor. I don't find it does much when used solely as a filter, and it's too crazy for my tastes when used as a standalone distortion. I also perform some EQ after the distortion to trim off some of the nasty low and high-end this thing produces, otherwise I get a muddy and gritty amp tone.
Top of Page
vi. Line 6 Distortion
This is the best distortion effect for standalone, high-gain distortion. I use it to simulate 90's Randall amp tones - it has that solid-state kind of tone where it seems unnaturally responsive and crunchy with no flub. I do like to pre-EQ it to add a little more midsy crunch and djent to it.
The difficult thing is finding a good amp to pair this with. I've had good results with some of the Marshalls, but you have to give them a little pre-amp Drive or the tone is weird - it almost gets a little fuzzy like the amp is struggling to work properly. Other good options are the Fender Blackfaces or the Divided by 13. The main thing to watch out for is excessive bass and treble. It's almost best to start with mids at 100% and everything else at 0% and work towards a natural-sounding tone. You're likely only going to be able to get so far, then use EQ effects to really shape things into a natural tone.
Top of Page
vii. Others
I find the others sound fake or just crazy. They'd be good for a kind of out-of-control intro tone, but I don't really mess with that very much.
The Heavy Distortion is supposed to be modeled after a Boss Metal Zone; but without the adjustable mid-frequency, it is nowhere near as versatile. I find I prefer to use the Line 6 Distortion where I would use this.
The Jumbo Fuzz is supposed to give you a Zepplin tone, but I haven't tried it yet. The Fuzz Pi is all over the place, which I haven't found a use for - maybe Nirvana? The Jet Fuzz is a phaser + distortion - I think I'd prefer to keep those separate. Same with the Octave Fuzz - I'd rather use separate effects and have more control over each.
The Buzzsaw, Color Drive, and Line 6 Drive seem to just add some dirt into the tone - definitely not my thing.
Top of Page
F. Power Amp D.E.P.'s
The best approach to these is to treat them like you would on a real amp. You'd likely spend most of your time finding the sweet spot for the master volume. Next you'd likely tweak the bias. Sag, hum, and bias excursion would be more complicated modifications to the amp that probably won't help the tone, other than the slight variation in such parameters you'd get from using different tubes.
Master
This controls the amount of power amp compression/distortion, similar to the master volume knob on a real amplifier. This setting affects how much the other settings affect the tone - they are colors of power amp compression/distortion. Setting this to lower settings (even all the way to 0%) approximates the tone of the pre-amp only models. This is helpful to dial in a sweet spot between the default "pre" and "full" amp models. It is also useful to dial out unwanted power amp distortion on cleaner models.
For the high-gain models, the default 50% sounds about where I like it. I may tweak a little this way or that way to make the tone a little edgier or smoother, but I generally don't go far. The Treadplate becomes rather harsh at higher settings, while the Fireball and Uber tend to compress and get a little more life in the midrange. I like to turn up the power section to around 65% on the J-800 usually.
Sag
Controls the amount of power amp sag, which is a dip in voltage over a sustained load. It mainly causes compression. See this wikipedia entry. Lower settings offer more of a dynamic attack and tighter feel, but can change the tone.
In general I leave this alone until I've made almost all my other tweaks. I'll use it to add more/less attack to the tone. I usually stay within 40-60%. Lower settings can make the tone a bit edgier bit thinner. That's usually the way I'll go with this. If I want to thicken the tone up, I usually add Decay in the Cab DEP's to do so. But for instance, my Petrucci Mark IV tone, I like to turn up both Sag and Decay to get it extra thick.
Hum
This controls the AC ripple plate voltage, which affects how the power tubes behave. For some amp models, this control has little effect; for others, it can be dramatic. It's hard to describe, and it varies from amp to amp. Also, the changes in tone are not completely linear. IE - if you find it to sound warm at 50% and cold at 25%, it's not necessarily going to sound really cold at 0% or really hot at 100%. Be warned: this control can cause weird things to happen to your tone when you move it off 50%. For instance, I liked the tone when I turned it up from 50 to 70% on the Uber model but noticed it introduced a faint, kind of digital-sounding ghost signal doubling my guitar parts. I almost always leave this control at 50%.
The big exception is the Uber model. I find a touch more Hum (55-60%) changes the distortion to thicken it up a little and make the overall tone a bit darker, which I really like. I also find setting it around 75% gives me a more evil tone, which I use to approximate a 5150. I have not had such luck manipulating this control on other amp models.
Bias
Determines the bias of the power tubes. Lower settings resemble class AB operation where you have more headroom and where you do get clipping, it is more natural sounding. Higher settings resemble class A operation, which is often said to sound warmer (more mids/presence) but can get grittier-sounding clipping.
I recommend playing with this control from 0 to 100% for your patches. It can cause subtle frequency response changes to the tone that you can't get using EQ. It seems to improve the signal-to-noise ratio for certain frequencies. It can also change your distortion tone. While I generally end up around 50%, I'm usually slightly one way or the other. In some cases, I'll have this at 100% while others at 25%.
Bias X
Controls bias excursion or how far the bias can deviate from its setting under different loads. I find this has the most effect on cleaner tones where the attack of the signal can be a spike exponentially larger than the sustained note - I've found higher settings clean up attack without sacrificing tone. Also useful to "lock-in" a bias setting by turning it down when you're getting power amp distortion. Or you can get some "bloom" to notes by turning it up.
I most often leave this alone, or dime it to get the vowel-y bloom effect I just mentioned.
Top of Page
G. Dual Amps
The Pod HD allows dual amps; however, I tend to avoid this, other than for dual cab purposes, which this section isn't referring to. I just don't like the way it sounds, especially for high gain. However, there are a couple ways to make it sound good, which I'll cover below. Additionally, it will eat up your DSP usage, putting strong limits on the amount and type of effects that you can use.
I first started experimenting with dual amps on the Pod X3. I figured if I like two different amps, mixing them together would sound great. Wrong! It felt like the amps were fighting each other, creating a noisy mush. To get them to clean up, I would have to pan one left and one right. This is one way to get a good sound from dual amps, but the problem is that you have to run this tone in stereo. If you want to record, you can't double track by panning one track hard right and the other hard left, which is what I like to do. You may think you can just record one stereo track with the two different amps already panned in the Pod, and this will sound just as good as if you recorded each amp as a mono track and panned them in your recording unit; but from my experience, it always sounds better to actually record two mono tracks.
The only way I could dial in a dual amp tone the way I liked was to basically crossfade their frequency responses. So I'd cut certain frequencies to the point where you couldn't hear them at all on amp A, then boost those frequencies so that they were the only ones you'd hear on B. In other words I'd mix the bottom end of one amp with the high end of another amp. Or I'd cut the mids out of one amp and dial in only mids on the other. I don't see this so much as mixing two amp tones as much as creating a single amp tone with parts of two different amps. IE - FrankenAmp.
In any case, I don't use dual amp tones, because I feel there is no significant tonal improvement, they take longer to dial in, and they limit the amount of effects you can run.
There is one exception to this rule, which is if your second amp is actually "amp disabled". This uses no DSP whatsoever. And it'll give you a clean tone, which you can use to reinforce your distorted tone. You want to pan both mixer channels to center and set the clean tone so it is just barely audible. You want it to really just add a little attack because a heavily distorted tone can lose some attack. Most of the time, I don't use this setup; however, because it is difficult to get right and I don't find it really delivers a much better tone. It's easier to screw up than get right. If you do use this approach, try adding some compression and EQ to the channel with no amp; so you don't get too much attack or bright clean tone.
Top of Page
H. "Full" vs. "Pre"
You'll notice there are two versions of every amp on the Pod HD, one with the amp name, and one with the amp name plus "pre". The "pre" amps only model the pre-amp section of that amp. They were designed to be used in combination with the Line6 DT-50 line of amps, which have switchable power sections/modes. Of course, most of us don't have DT-50's.
People on the forums have argued a lot about which versions you "should" use for any particular setup. For instance, I've often seen posts saying that if you are running the Pod to a real amp, you should use the "pre" version, because otherwise you're getting the power amp emulation plus power amp distortion from your real amp. Likewise, if you run "direct", you "should" use the "full" model, otherwise you're not getting any power amp in the sound. They argue that you want one power amp coloration, not zero or two.
This is logical, yet I disagree nonetheless. The power amp emulation has a rather profound effect on the way the Pod's amp models sound, even if you turn down the "Master Volume" DEP or set the bias colder. Your real amp is unlikely to replicate how that amp model's power section sounds on the Pod. You might not be cranking your amp to the point where it's getting power amp distortion, even at gig levels - many power sections are designed to have lots of headroom and remain transparent. And even if your amp's power section does get pushed into overdrive, it may still sound good with the "full" model on the Pod. Just because you're running two power amp colorations doesn't mean it will necessarily sound worse.
On the other hand, there is a certain crispness in the "pre" models that seems to be lost in the "full" models, even with the Master DEP at 0%. Even if the frequency response is not ideal, it can be tweaked to where you want it with amp EQ or EQ effects.
Thus, in general I prefer to use the "full" models for "direct" tones, while I'm about 50/50 on which to use for "live" uses - it depends on the patch.
Keep in mind that if you have a power amp that easily distorts, it is more likely to sound better with the "pre"s than the "full"s. I encourage you to experiment to determine what suits you best. On the other hand, some tones rely on power amp distortion. If your power amp isn't providing the same breakup, you will have to use the "full" model or won't be able to achieve the desired tone, even if you crank your real amp.
Finally, if your real power amp does distort at volume levels you will be playing at, take note to make patches that distort it in a desirable way. As noted earlier, the EQ of the tone you send to your amp will greatly affect the way it breaks up. If you use too much bass, the power amp distortion may make the tone muddier than you like. Your gear is limiting you. You'll have to brighten up your patches to compensate or get new gear or play at lower volumes.
Top of Page
I. The Elusive Pure Clean Tone
The PodHD doesn't offer any pure clean amp models (yet? as of 7/18 there is a Soldano SLO Clean model available for the 300/400 that may fit this bill), like a Roland Jazz Chorus. This doesn't mean getting a pure clean tone is impossible though.
The cleanest amp model is the Blackface Dbl, based on a blackface Fender Twin Reverb. Line 6 modeled it in "warts-and-all" fashion, meaning it can get a little nasty sounding when running modern high-output humbucker pickups into it, rather than the 60's era single-coil pickups it was designed for. Still, there are a number of ways to tame it. Here's a list, ordered by what I prefer to preserve tone, which applies to getting a cleaner tone in general on all the amps.
- Change input settings - input 1:guitar, input:2 variax
- Put a Studio EQ in front the amp, and set gain to -X db.
- Use no amp model, using compressors and EQ effects to simulate one
- Try turning up bias or bias X
- Try turning down Master Volume
- Use a Parametric EQ to find which frequencies really push the amp to nasty breakup, then reduce those frequencies (you can dial them back in after the amp)
- Use pre-amp models instead of full models
- Change input impedance - lower values will be softer, darker, and looser but less likely to distort
My favorite tone from the amp comes from a dual amp tone combining the Blackface Dbl on one channel with no amp on the other. I use a compressor and some EQ on the "no amp" channel. Then just set the volume so that they complement each other. You get the shimmering clean sound of a compressed and EQ'ed raw guitar signal mixed with the warmth of the Fender clean.
I also did a little experiment to see how much power amp (crossover) distortion I could dial out of the Blackface Dbl without causing it to lose its desirable tonal nuances. You might still get a little distortion using the advice below, but the idea was to preserve tone more than completely dial out distortion. All starting values are the exact default settings when you select the amp.
- Default Master Volume is 100%. Change that to 20%.
- I found changing the Bias changed the tone too much. I was able to get good results from Bias X, though. I set it to 80% and that helped clean it up a little. I assume this means that the bias is changing to a colder setting when it would be pushed hard enough to exhibit the crossover distortion, but not for any notes softer than that. I changed Bias X from 50% to 80%.
- Turn Drive from 37% to 60%.
- It seems like this may change the dynamics just a little bit. I tried adding a Tube Comp before the amp. I set Level to 0% and Threshold to 95%. I think I prefer the tone without the Tube Comp - you may want to try it though.
Some general notes:
-
For my setup, I put amp/channel volume at 50%. Any higher than this and I'd clip my DAW input. But I run via SPDIF and I think I boost the SPDIF output level. So you might be able to go higher.
-
My mixer has channel 1 panned full left and channel 2 panned full right. Levels for both channels are 0 db.
-
My input impedance is on auto. My input settings are input 1: guitar, input 2: same. Pad switch is turned off.
-
Test guitar is EBMM JPM. Tested bridge pickup for dialing out crossover distortion by strumming as hard as I can. Tested tone using single notes and chords all over the neck for bridge, neck, and coil-tapped bridge+neck pickups.
Top of Page
J. Noise Gates
Noise Gate vs. Hard Gate
There are two noise suppressors on the Pod HD, the standard "Noise Gate" and the more advanced "Hard Gate". In general I prefer the Hard Gate, because its a true gate. The Noise Gate is part gate, part signal processor and can result in "tone suck". At higher settings, it tends to make the tone sound thinner.
The Noise Gate uses less DSP than the Hard Gate; however, so sometimes it's the Noise Gate or nothing, and I use it with lower settings then.
Gate Overview
Here's what a noise gate is designed to do - either let signal pass through or block it completely. It's helpful to think of it like a physical gate. When "open", the signal should pass through untouched as though the noise gate isn't even in your signal chain. When "closed", no signal should be allowed to pass through. The gate detects the signal's volume level, compares it to a threshold setting, and determines whether the gate should be open or closed.
Most gates also feature a Decay parameter. This specifies how quickly the gate should close - whether the signal should fade out over time or be abruptly silenced. a 0 setting means the signal should jump from the threshold level to no output. Higher settings fade out over the specified time period.
Some gates feature a Hold parameter. This keeps the gate fully open even after the signal level diminishes to less than the Close Threshold. After the hold time is elapsed, if the the signal level did not return above the Open Threshold, the gate starts to close at the speed specified in the Decay parameter.
Open/Close Thresholds
The Hard Gate has two threshold levels - open and close. If the gate is currently open, it is only looking at the Close Threshold value to determine if it should close. If the gate is closed, it is only looking at Open Threshold to determine if it should open. This helps in two ways.
Single threshold gates are subject to jitter - consider a sustained note that is gradually decreasing in volume. The level you hear might be 96, 95, 95, 95, 95, 95, 94 db at 1/20th of a second intervals. The level the gate detects might be a little different, let's say 96, 95, 94, 95, 94, 95, 94. If the Threshold was set to 94.5 db, the gate would open and close rapidly as a decaying note hit the threshold value. It would sound like sputtering, which is very noticeable and undesirable.
With separate Open and Close Thresholds, you can set them a few db's apart, and the imprecision in the effect's signal level detection will not cause a sputtering gate.
This also comes in handy due to guitar naturally having a strong attack. Setting the Open Threshold high means when the gate is closed, you won't accidentally open it with soft noises you make when you're not trying to play a note, such as your fingers rubbing on unfretted strings. Yet, once you do purposefully play a note, the attack is strong enough to open the gate. Setting a single threshold gate to such a high threshold would mean that sustained decaying notes would get "cut off" rather than naturally fading to silence. With a low Close Threshold setting, however, you can let the note decay to almost silence before the gate closes.
While you can fake the above technique with a single threshold gate by turning up the Decay parameter, it's more favorable to set Decay lower and use two tresholds. It sounds better, and you'll get the expected gate behavior when your playing quick staccato notes or sustaining notes.
Hold
The Hard Gate also features a Hold parameter that specifies a time to hold the gate open even after the Close Threshold has been passed. This can be used to reduce jitter as described in the last section, but as mentioned, staggered Open/Close Threshold settings should take care of that.
Where I find Hold is useful if you are using a longer Decay time. If you are playing a staccato part, the fade-out of the noise between notes is very noticeable, compared to if the noise were to remain at a constant level. Setting a hold time is basically taking a little time to make sure the gate should really be closing.
Decay
For a spacious lead tone, where any decay is going to be buried by reverb or delay, I like to turn Decay a bit off 0 such as 100-200ms - so there's not an obvious sound when the gate kicks on. For super tight rhythms, I like it at 0; but this means I have to be careful about my muting and exactly where I set the Threshold(s).
Placement in the Chain
As far as placement in the signal chain, I find the most effective place is first in the chain - most of the noise in your tone is coming from the low signal-to-noise ratio and hum produced by guitar pickups. Anything that is compressing the tone in your chain, such as compressors, distortion pedals, and amp models, are amplifying that initial noise. You might think that this would mean to put them last in your chain (or after a compressing element), but then they are very difficult to dial in.
Note that the signal from your pickups is going to by the most dynamic, which makes it best for dialing in gate settings. If you only place a gate after some kind of compression, it will be difficult to find settings that let only let your playing through and not noise but still allow all your playing through.
Dialing it in
To dial in the Hard Gate, start with Hold and Decay set to 0 ms. Set both Open and Close Threshold around 9:00 (about -70db) - easily opened but still high enough to make the gate close when muting. If the gate won't close at these settings, turn them both up until the gate closes with the guitar muted, but with its volume knob at 10/10.
Then I see if I can make the gate open using a mundane noise, such as tapping a string, or rubbing a string with my finger. If so, I turn it up a bit. Once I've gotten it high enough so it won't open from any incidental noises and intermittent hum, I see if it will open by playing the softest note I intend to play. This varies from patch to patch. For a soft lead patch, this might be a mild hammer-on onto a silent string. For my Meshuggah rhythm patch, it's going to be a picked note at at least medium strength. If it won't open, I have to turn it down, even if this means it will also open from incidental noise as I play. Better for it to pick up some incidental noise than block out purposeful playing.
Then I back down the Close Threshold. I want to test it against punchy staccatto notes and chords as well as sustaining notes. I need it to activate between my stacatto playing but not kill a sustaining note; however, these are conflicting goals.
The "middle ground" I choose depends on the patch. For a soft lead, I want it low enough to sustain notes as long as possible. This means I have to make sure the guitar is completely muted to get the gate to close, so I have to pay more attention to doing so if I'm trying to play stacatto or after I let a note decay. For my Meshuggah patch, I want to make sure it activates as soon as I mute the guitar, even if my mute didn't have perfect technique. I'm not sustaining many notes for very long, especially single notes higher on the fretboard which are more sensitive to decay. So long as it doesn't cut off a sustained power chord after a few seconds, I'm happy.
I leave Hold at 0 ms. The Hard Gate is precise and quick enough so that I don't have to worry about trailing noise when quickly muting the guitar from a loud volume. Since I set Decay to a very low time, I don't need to worry about hearing a fade-out of noise either.
If I can get away with setting Decay to 0 ms, I'll do that, but if the gate kicking on creates an unnatural tone, I'm going to either need to use two gates, or introduce a little Decay. I set it just barely off 0, at like 20 ms. The slight decay prevents an unnatural cut-off sound, but it's not long enough so that you hear noise fade out after staccato notes. If it's not tight enough, we'll have to use two gates.
Dual Gates
Using two gates is useful when you're using strong compression or distortion, and you need to go from punchy chords to dead silence very quickly. I like to place the first gate as the first thing in the chain. I dial it in as described above, but it may not kick on fast enough, and those snippets of noise occurring as I'm muting are being amplified and are obvious when listening to the tone.
I add another gate after the compressor/distortion stage that is adding most of the compression. For many people, this is the end of the chain. For me, it's usually before the amp, but after a compressor or distortion effect with a little drive. I dial this one in exactly like the first one, and I turn the first one off while I'm doing so.
Once I've got them both tuned, I try the patch out with them both on. Sometimes it'll end up gating a little too much. I tend to back off the first gate a bit, while keeping the final gate firm.
Top of Page